一、准备
- 安装node.js
- 安装git-windows
安装hexo-cli
1
$npm install hexo-cli -g
在GitHub上创建<username>.github.io的仓库
e.g. 11wy11.github.io配置SSH key
打开本机的控制台,以windows系统为例,可以执行win+R 输入cmd打开,执行1
ssh-keygen -t rsa -C 'D:/id.txt'
然后连续按3次回车,最终会在用户目录下生成一个文件,找到目录.ssh/id_rsa.pub文件,用记事本打开全选复制。
在你的github上点击头像>设置进入设置页面,选择SSH and GPG keys, 点击New SSH key按钮,名称随意填写,将刚复制的内容粘贴到key,添加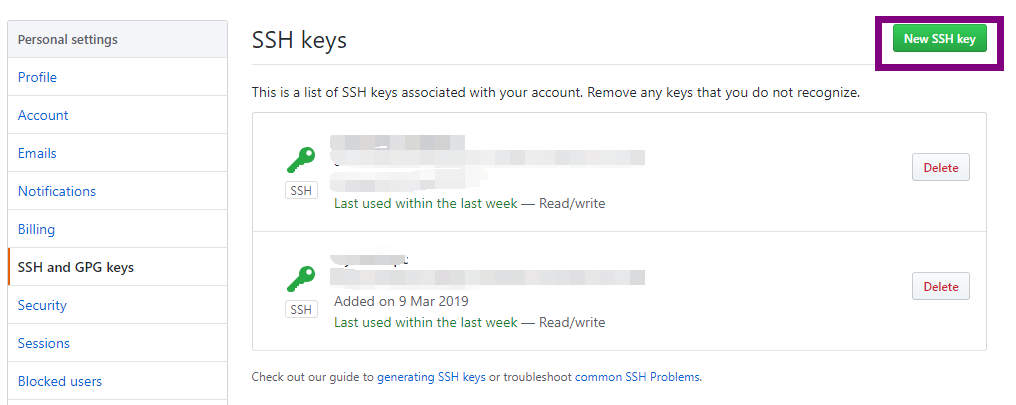
二、搭建流程
- 本地创建<username>.github.io
在本地<username>.github.io文件夹下初始化hexo项目并安装依赖
1
2
3
hexo init //初始化工程
npm install //安装依赖
hexo server //启动本地调试器在localhost:4000预览修改默认主题,可以在github上clone其他的主题,如yilia,icarus,indigo等
以indigo为例,在本地<username>.github.io文件夹下执行以下命令安装主题
1
git clone git@github.com:yscoder/hexo-theme-indigo.git themes/indigo
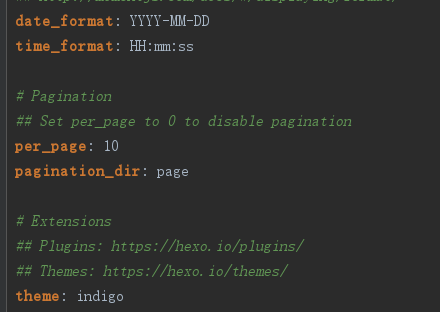
修改工程中的_config.yml配置文件,将themes: landscope改为themes: indigo
依赖安装分别安装Less,Feed,Json-content依赖,执行如下命令
1
2
3
$ npm install hexo-renderer-less --save
$ npm install hexo-generator-feed --save
$ npm install hexo-generator-json-content --save执行
hexo s命令启动服务器在localhost:4000查看效果
- 新建文章,使用hexo new “my-first blog”,会在source/_posts下创建my-first-blog.md的页面文件
进行编写 发布博客
首先修改工程中的_config.yml配置文件,在最后三行添加以下代码,将username换成自己的git用户名1
2
3
4deploy:
type: git
repo: git@github.com:<username>/<username>.github.io.git
branch: master其次安装hexo-deployer-git 执行
npm install hexo-deployer-git --save
在工程文件夹内右键git bash进入命令行 输入hexo g,编译为静态文件,生成public文件夹,使用 hexo d 部署,此时可以访问https://<username>.github.io查看你的博客备份源码
在工程文件夹内右键git bash进入命令行 输入 touch .gitignore ,生成“.gitignore”文件。
在”.gitignore” 文件里输入你要忽略的文件夹及其文件就可以了。(注意格式)
我的 .gitignore:1
2
3
4
5
6
7
8node_modules/
.deploy_git
public/
.DS_Store
Thumbs.db
db.json
*.log
.deploy*/执行以下命令
1
2
3
4
5
6
7
8
9
10
11
12#git初始化
git init
#创建hexo分支,用来存放源码
git checkout -b hexo
#git 文件添加
git add .
#git 提交
git commit -m "init"
#添加远程仓库
git remote add origin git@github.com:<username>/<username>.github.io.git
#push到hexo分支
git push origin hexo执行hexo g -d生成网站并部署到GitHub上
这样一来,在GitHub上的git@github.com:<username>/<username>.github.io.git仓库就有两个分支,一个hexo分支用来存放网站的原始文件,一个master分支用来存放生成的静态网页。- 其他设备更新博客步骤:
1、先安装hexo
$ npm install -g hexo-cli
2、存在github上的git clone下来
git clone -b hexo git@github.com:<username>/<username>.github.io.git
3、项目文件夹下
$ npm install
$ npm install hexo-deployer-git
4、重新配置github和coding的公钥
5、编写博客push 到远程分支补充
- 有时会出现下载的主题无法上传,首先删除themes/主题文件夹下的
.git,使用git rm --cached themes/indigo命令清空后重新上传` - 如果最开始.gitignore文件没有配置正确,可以使用
git rm -r --cached .命令清楚缓存文件,重新add,commit,push上传 - 当使用node 14以上版本,使用hexo d命令部署时,会提示AGType错误,需要将node的版本退回到12,可以使用nvm管理多个版本的node,具体步骤如下:
- 下载nvm(https://github.com/coreybutler/nvm-windows/releases) setup.zip,安装,注意不要将nvm安装到默认的c/program files下,换一个盘,不然安装node之后会提示node命令找不到
- 在控制台,使用
nvm install node@12.4.0命令安装node,可以使用nvm ls 查看当前安装的node版本,使用命令nvm use 12.4.0使用指定版本,使用命令node -v 或 npm -v检查安装是否成功
